IR Cameras: Inspecting for Moisture Intrusion
Detecting moisture intrusion problems is an excellent application for thermal  imaging or infrared (IR) cameras. Moisture intrusion may be identified through basic visual inspection if it has lead to obvious defects, such as staining or mold growth. By the time visible evidence has presented itself, however, significant damage may have already been done. In many cases, moisture or water intrusion may have been developing for a while before obvious signs become apparent. By employing thermal imaging and a moisture meter, inspectors can locate moisture issues before they become large problems and lead to serious damage, as well as gather details in cases where moisture intrusion has already become obvious.
Advantages
- It's time-saving.
- It's easy to set up.
- It allows examination of areas that are not visible to the naked eye.
- It allows examination of areas that are difficult to access, such as tall ceilings.
- It allows for larger areas to be examined quickly.
- It helps locate sources of moisture intrusion.
- It helps determine the extent of moisture intrusion.
- It allows the user to trace the moisture intrusion through other affected areas.
- It provides visual documentation of moisture intrusion.
- It identifies moisture without the need for direct contact in potentially unsanitary areas, such as behind toilets.
There are few disadvantages associated with using infrared imaging to locate sources of moisture intrusion. There is a slight learning curve at first, but, with time, inspectors can become more adept at accurately reading images and utilizing the equipment to its fullest capabilities. Extensive documentation is available from manufacturers on how to use all the features of their products.
It's important to remember that thermal imaging should be used in conjunction with a moisture meter to identify moisture intrusion problems. Once a potential trouble spot is located through thermal imaging, the problem can be verified with the moisture meter. Moisture meters come in different models that are both invasive (with probes) and non-invasive.
Applications for Finding Moisture
Since infrared technology provides so many advantages for inspecting for moisture intrusion, it is applicable in many situations. Inspectors can benefit by using an IR camera in the following scenarios:
- during an energy audit. Thermal imaging makes apparent any areas of moisture intrusion (and air leaks) of the building envelope;
- after a water-damage event, such as a flood or pipe rupture. Thermal imaging can help document the scope of the damage, as well as find affected areas that may not be immediately obvious;
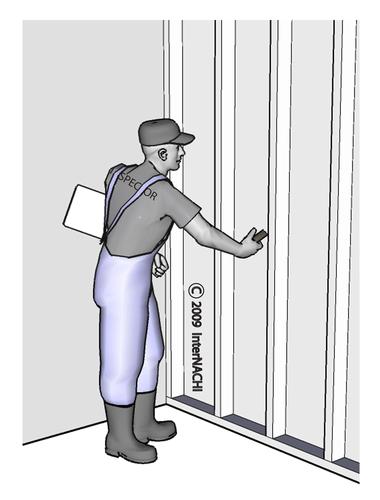
- behind finished basement walls. Inspectors can view inside for moisture in a non-intrusive way;
- if an in-slab water supply or waste line is suspected of leaking;
- when windows, doors or other openings are suspected as points of moisture (or air) intrusion. Thermal imaging can help confirm such suspicions;
- to help identify wet spots in insulation;
- to locate hidden leaks under resilient flooring; and
- to find wet areas in inaccessible spots, such as a narrow crawlspace and inside ductwork.
Inspecting with Infrared Cameras and Moisture Meters
At the beginning of an inspection, getting oriented within the interior to be inspected is immediately helpful. Knowing the general layout of the house can help determine where to start inspecting. Exterior walls should be noted in relation to shared walls, as well as areas of the floor above. Is the bottom of a basement wall above or below grade? Is there a deck above the room being inspected? the roof? another room? What part of the particular room being inspected is a likely point for moisture intrusion? Taking such factors i nto account can help determine the obvious areas to start inspecting with the IR camera.
After identifying the areas that are most at-risk for moisture intrusion, along with any visual evidence, such as staining, discoloration, and/or apparent wet spots, the surfaces can be scanned with the IR camera to locate the source of problems. Since the apparent temperature of wet spots will be lower than that of building materials, moisture will be visible through thermal imaging as dark areas. After a potential problem is located, it can be confirmed with a moisture meter. The issue can then be documented by saving an infrared image alongside a digital photo to include with a description of the problem in the inspection report.
It is also important to keep in mind that a house is a dynamic system, made up of many components that are all interconnected and interactive. Leakage or moisture intrusion at one point will likely affect other areas as it moves or grows. Attention should be paid to what other areas are at risk downstream from the point of moisture intrusion. For example, if an upstairs toilet is found to be leaking, the ceiling area in the room below it should be examined. Using thermal imaging, all the areas affected by leaks or moisture at a specific location can often be traced down the line and documented, giving a fuller picture of the nature and extent of the issue.
Important Areas to Check
- in the kitchen around the sink, under the dishwasher, behind the ref
 rigerator, and under the cooking range, as well as around vents and exhaust fans;
 - in bathrooms around plumbing fixtures and outlets, shower and bathtub enclosures, fixtures and vents, the toilet and bidet, and windows;
- the HVAC system;
- the water heater;
- in the attic, including roof pass-throughs and penetrations, connecting walls, vents and fans, and recessed lights;
- in the basement, including walls, ductwork and crawlspaces;
- in the laundry area around the washer and dryer hookups, drip pans and exhaust vents, as well as utility sinks.
Infrared cameras are popular for finding moisture intrusion problems because of the many advantages they provide over conventional methods. Using an IR camera in conjunction with a moisture meter allows problem areas to be located quickly and documented easily. Inspectors can benefit from recognizing the applications of this technology and understanding the different ways to use it to their business' and their clients' advantage.


