Mastering Roof Inspections: Asphalt Composition Shingles, Part 19
by Kenton Shepard and Nick Gromicko, CMI®
The purpose of the series “Mastering Roof Inspections” is to teach home inspectors, as well as insurance and roofing professionals, how to recognize proper and improper conditions while inspecting steep-slope, residential roofs. This series covers roof framing, roofing materials, the attic, and the conditions that affect the roofing materials and components, including wind and hail.
COUNTER-FLASHING
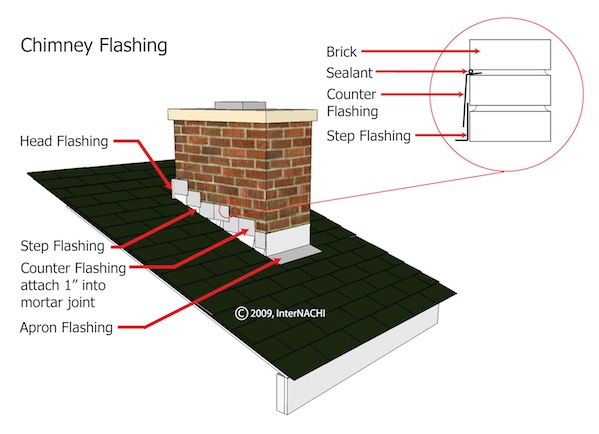
Counter-flashing is designed to prevent moisture from entering behind the vertical flange of headwall and sidewall flashing.
Sometimes, the exterior wall-covering material serves as the counter-flashing, and sometimes a separate counter-flashing may be installed. Counter-flashing is especially important where walls are brick or stone.
Counter-Flashing at Brick Walls
Headwall and sidewall flashing installation becomes more time-consuming to do correctly when the exterior wall covering is brick. It is also more expensive to do, which is why most of the counter-flashing you’ll see at brick walls is poorly installed and relies on a sealant alone to prevent moisture intrusion. Sealant eventually dries, shrinks and cracks, leaving an avenue for moisture intrusion.

In brick, counter-flashing sections are inserted into slots cut into the mortar joints, which are then sealed.

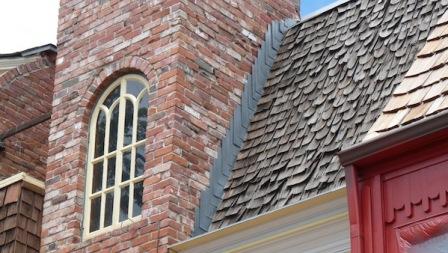
Here’s an example of counter-flashing installed correctly, although the grooves cut into the mortar should be sealed better.

Here, you see flashing that looked good from the street, but, viewed more closely, the flashing is actually poorly attached using sealant and roofing nails, leaving an avenue for moisture to enter behind it and leak into the roof structure.

Sometimes, there’s no counter-flashing at all.

Another acceptable method of installing counter-flashing is to insert it into a groove cut into the face of the brick.

The groove should be completely filled with sealant to avoid freeze damage.
Counter-Flashing at Stone Walls
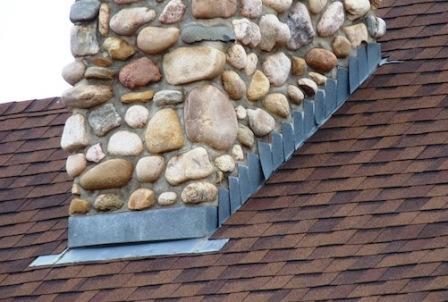
Counter-flashing is also often poorly installed where sidewalls and headwalls are stone. Where stone veneer is installed over concrete block or framing, the vertical flange of the flashing should extend up behind the stone. Chimneys are good examples because they have both sidewalls and headwalls.

Here’s an example of counter-flashing installed correctly. Sidewall counter-flashing tends to separate from the wall over time, and you’ll often see roofing nails in the mortar lines.

These counter-flashing installations aren’t perfect…

...but they’re acceptable because they’re effective at preventing moisture intrusion.

The more uneven the stone surface is…

…the more challenging it is to counter-flash correctly.

**************************************************
Learn how to master a roof inspection from beginning to end by reading the entire InterNACHI series: Mastering Roof Inspections.
Take InterNACHI’s free, online Roofing Inspection Course
Mastering Roof Inspections
Roofing Underlayment Types
Inspecting Underlayment on Roofs
Fall-Arrest Systems
Roofing (consumer-targeted)
More inspection articles like this

