Mastering Roof Inspections: Asphalt Composition Shingles, Part 18
by Kenton Shepard and Nick Gromicko, CMI®
The purpose of the series “Mastering Roof Inspections” is to teach home inspectors, as well as insurance and roofing professionals, how to recognize proper and improper conditions while inspecting steep-slope, residential roofs. This series covers roof framing, roofing materials, the attic, and the conditions that affect the roofing materials and components, including wind and hail.
SIDEWALL FLASHING
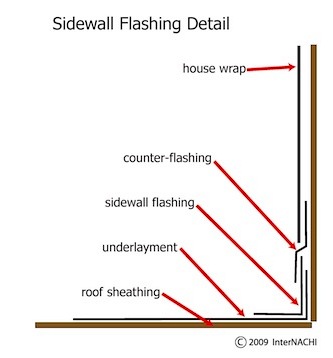
A sidewall is a junction between a wall and a sloped portion of roof.
Step-Flashing

Sidewalls on roofs covered with asphalt shingles should always be flashed using step-flashing. A step-flashing is a short section of flashing that overlaps each shingle in the course below and is overlapped by each shingle in the course above.
Counter-Flashing

Sidewall Defects


You’ll see it fairly often because it’s a common defect. It’s easier to see in some situations than others.

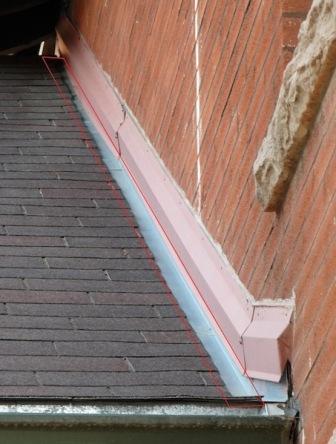
This is an example of a defective installation where an asphalt shingle roof meets a stone sidewall. Instead of installing the step-flashing between the shingles, the lower flange rests on top of the shingles.

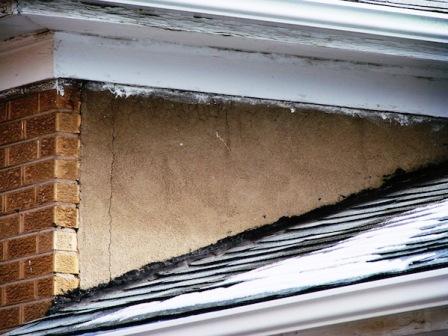
You’ll see sealant substituted for flashing in many different areas on roofs.

Sealant will eventually dry, shrink and crack.
Correction is most easily accomplished when the roof is replaced, but that can be expensive. These asphalt shingles are installed over wood shingles. If the limit in this jurisdiction is two layers, then, before re-roofing can take place, all roofing materials will have to be removed.
Since many jurisdictions no longer allow wood roofs, and asphalt shingles should not be installed over spaced sheathing the way wood shingles are, then this roof would need solid sheathing installed over the existing sheathing across the entire roof.
The new step-flashing will need to have the vertical flange inserted behind the exterior wall covering. In this case, that’s wood shingles, too. This might require cutting the wall shingles up a couple of inches above the surface of the new sheathing. There will be nails in the way when the roofer is inserting the vertical flange. It will not be a quick process. It will be expensive to have done correctly.
Because this is something of a quality issue and a potentially large expense, you might not want to be aggressive in insisting that this condition be corrected. If you were inspecting this home, you’d want to alert your client to the fact that this condition might involve considerable future expense to correct. You should also recommend annual inspection and re-application of an appropriate sealant, as necessary, and let your client know that the sidewall joint should have had flashing installed.
Considering the age of this home, it may have been correctly flashed when it was first built, but the original flashing may have failed due to corrosion.

Correction can be even more expensive with other types of wall-covering materials.
Wall-Covering Clearance

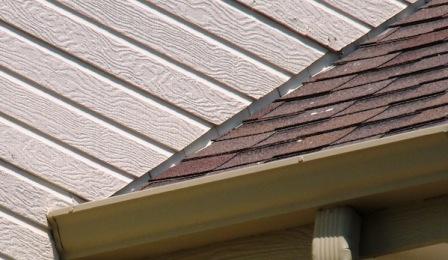
In both headwall and sidewall conditions, unless the exterior wall is brick, you should see a gap of at least 1½ inches between the bottom of the exterior wall-covering material and the top of the roof-covering material.
**************************************************
Learn how to master a roof inspection from beginning to end by reading the entire InterNACHI series: Mastering Roof Inspections.
Take InterNACHI’s free, online Roofing Inspection Course
Mastering Roof Inspections
Roofing Underlayment Types
Inspecting Underlayment on Roofs
Fall-Arrest Systems
Roofing (consumer-targeted)
More inspection articles like this

