Mastering Roof Inspections: Asphalt Composition Shingles, Part 17
by Kenton Shepard and Nick Gromicko, CMI®
The purpose of the series “Mastering Roof Inspections” is to teach home inspectors, as well as insurance and roofing professionals, how to recognize proper and improper conditions while inspecting steep-slope, residential roofs. This series covers roof framing, roofing materials, the attic, and the conditions that affect the roofing materials and components, including wind and hail.
IRC Requirements
The IRC doesn’t give specific flashing details which have to be followed. It says that flashing has to be corrosion-resistant, and installed in a manner that prevents moisture entry.
Multiple methods can be used to install flashing correctly, so you won’t be looking for only one method and calling everything else a defect. You'll be checking to see whether flashing was installed in a manner that will prevent moisture entry, and you’ll be looking for corrosion.

The IRC requires roof flashing to be installed in the following locations:
- headwall and sidewall areas (anywhere a roof meets a wall);
- changes in roof slope or direction, which includes changes in pitch, and places where roofs intersect to form hips or valleys; and
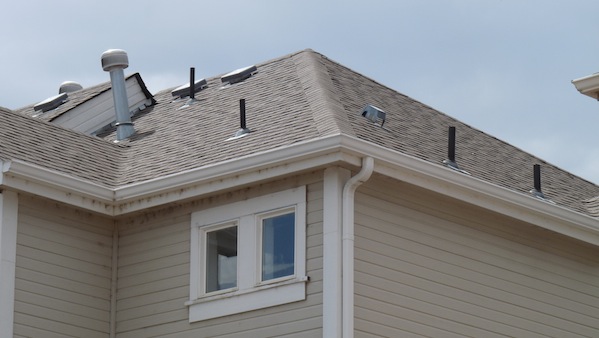
- around roof penetrations. "Penetrations” include anything that penetrates the roof, such as chimneys, vents and skylights.
Let's take a look at some of these areas in detail.
ROOF-WALL INTERSECTIONS
Places where roofs and walls intersect are called headwalls and sidewalls.
Headwall Flashing
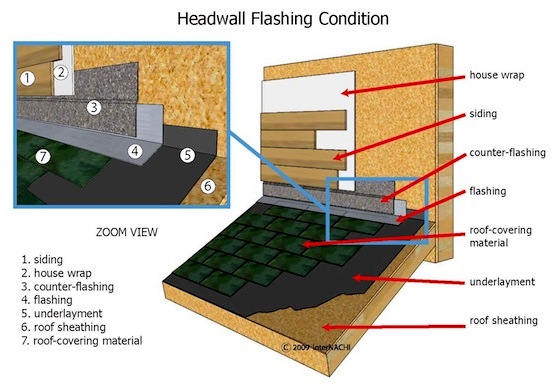
A headwall is a junction where the top of a sloped roof meets a wall.
This image shows proper flashing at a headwall condition.
Headwall flashing should extend up behind the exterior wall covering and down over the shingles, as you see here. This image shows counter-flashing installed behind the siding.
Sometimes, the exterior wall-covering material serves as the counter-flashing, and this is acceptable.
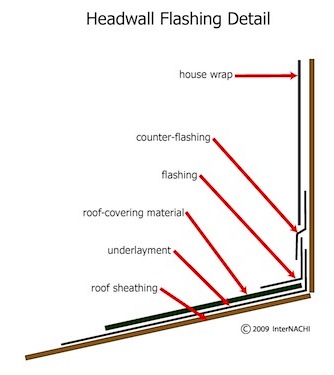
Flashing should always overlap the roof-covering material. However, for aesthetic reasons, on asphalt shingle roofs, the headwall flashing flange that extends down over the shingles is often covered with a course of shingle tabs.
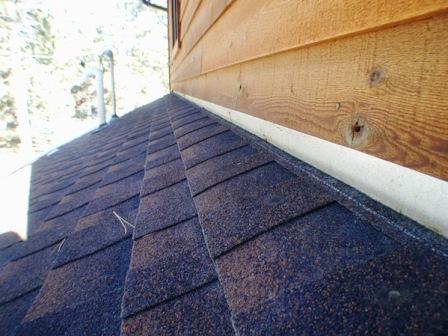
Sometimes, it can be difficult to tell.
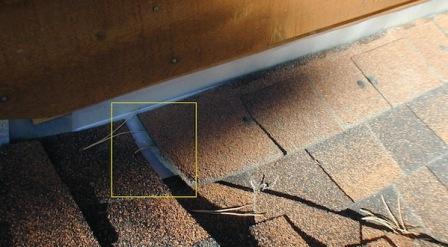
Don’t mistake this condition for headwall flashing routed beneath the shingles and call it a defect.
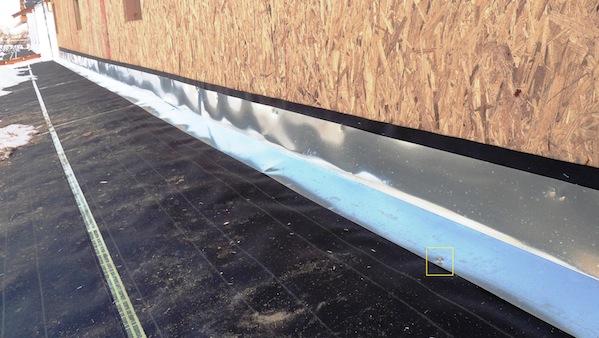
Here, you see new construction where headwall flashing was installed behind the siding and is waiting for shingles to be installed. The flange that rests on the underlayment is only tacked. Shingle installers will pull the tacked nails and slide the shingles beneath the flashing.
Building codes give no minimum dimensions for headwall flashing that apply to every manufacturer and jurisdiction, so your concern is to check to see whether headwall flashing was installed in a manner that will keep the water out. Common flange sizes are 4x5 inches.

Headwall flashing typically comes bent to 120 degrees. It can be easily flattened for roofs with shallower pitches.

**************************************************
Learn how to master a roof inspection from beginning to end by reading the entire InterNACHI series: Mastering Roof Inspections.
Take InterNACHI’s free, online Roofing Inspection Course
Mastering Roof Inspections
Roofing Underlayment Types
Inspecting Underlayment on Roofs
Fall-Arrest Systems
Roofing (consumer-targeted)
More inspection articles like this

